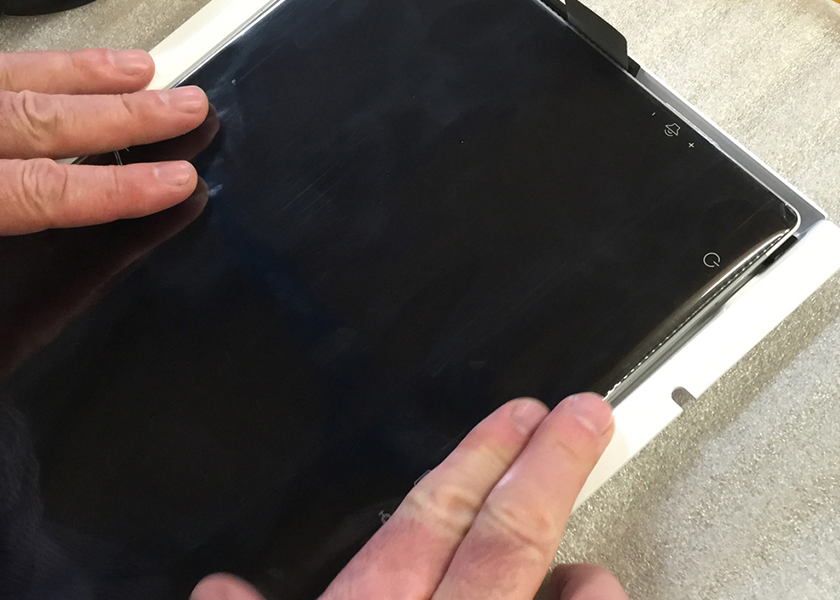
This case study looks at an Internet of Things (IoT) unit we designed and manufactured for a kiosk printing solutions company. They were after several free-standing units that could house a Microsoft Surface Pro securely, as well as a bulky printer.
The unit had to be secure to withstand theft, stable to take the weight of a top-heavy set of electronics and be easily transported in two sections (top and bottom). Access was required to the printer to allow for ink cartridge changing and restocking of paper. All of this was considered and demonstrated in the visuals to the client.
The next step was to break the proposed 3D visual into flat drawings so the CNC machines can interpret the design for cutting.
Laser cutter
The CAD drawings are realised into machine friendly code and passed to the CNC laser cutting machine which cuts out the required pieces of sheet metal.
Press brake
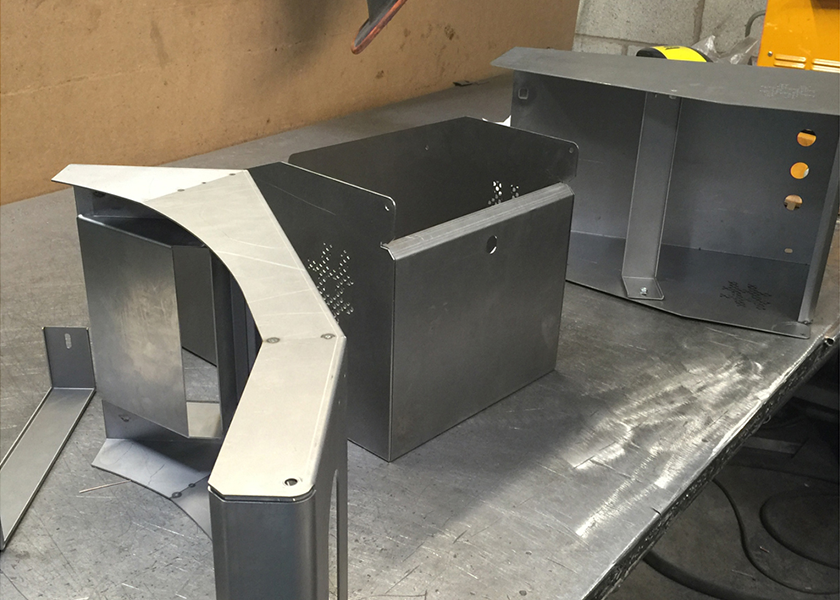
Next stage is for all the cut sheet metal pieces to be bent. Our press brake operator took each part in hand and bent them according to the CAD drawings, as well as using his expert knowledge to bend each in the correct order.
Welding
The pieces then made their way to our welding bays. Here they are TIG welded along all the seams and joints to complete the unit’s top and bottom sections.
Grinding and linishing
After the sheet metal pieces were fabricated together, they’re off to the grinding and linishing department. This is where our head of the department ground and sanded each weld joint, removing any welding marks or blemishes perfecting the finish prior to paint.
Powder coating
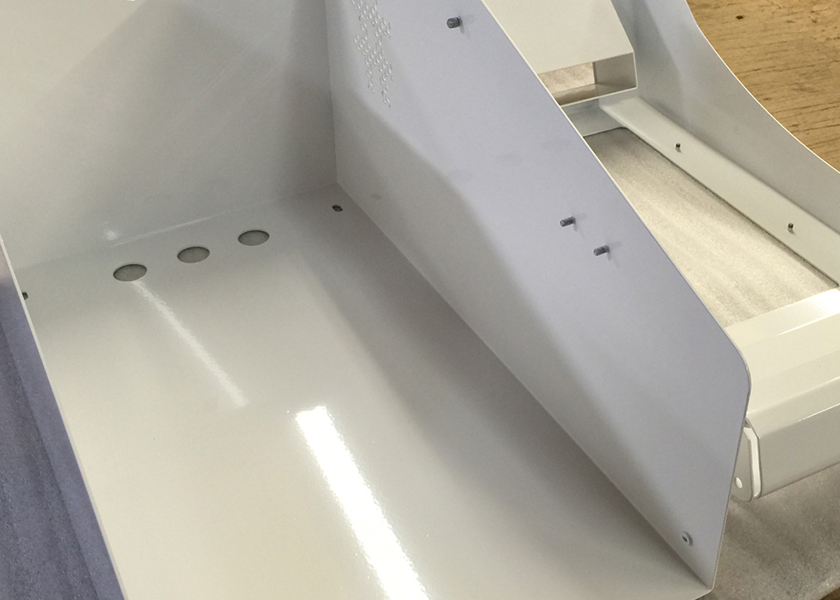
Once the units are sanded, it was time for the powder coating team to paint each part, gloss white. The client chose white so they could brand up the unit with vinyl graphics as required.
All the pre-inserted flush head studs are covered with special caps to keep them from being coated in paint. If they were not covered they would be coated in paint and as a result the machine threads would be fouled up making them useless.
Assembly
Once all the metalwork had cooled from the painting plant, it was time to assemble the first unit to test all the elements fitted, and everything connects as planned. The lid was constructed first by adding the gas struts to the lid, followed by adding padding and cushioning to the tablet’s cradle.
Then the top section is fitted to the base plinth. The two plinths are designed to slot together with a tongue and groove design, then secured in place with large plastic screws that can be hand tightened. The unit is designed so that it can be assembled by someone without tools, hence the larger screw head designed for hand tightening.
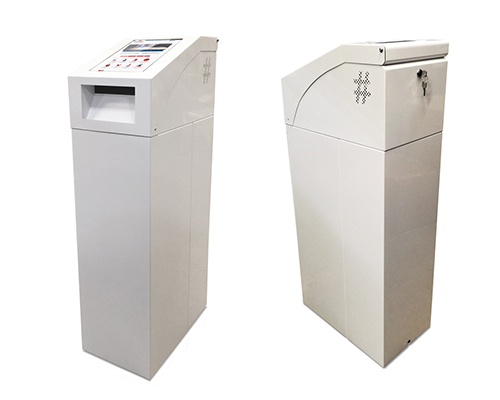
Final product
Two design features of this unit also include a ‘mouse hole’ like cut in the back panel of the plinth base. This is for the printer and tablet’s charger cable to feed through. Likewise you’ll notice from the photo that the unit is raised off the ground. The unit has four threaded screw feet. This is to allow for uneven surfaces and accommodate unusual flooring to make the unit stable.