CASE STUDY
Large security cabinet and safe
This large security cabinet, primarily a money safe, is designed for a leading high-street chain of stores to allow easy depositing of cash from the shop floor. Our client briefed us with the requirements of the security cabinet, provided the preferred locks for us to integrate into the design and provided the general specifications to follow. This case study follows the initial prototype in the factory.
Before you read on, here’s a snapshot of the complexity of the metalwork of the 5 main units making up this cabinet:
- Measures height 1500mm, depth 600mm and width 600mm
- 7 sheets of mild steel, at 2.5m x 1.25m in varying thicknesses
- 301 ancillary fixings including hinges, nuts, rivets, screws and washers
- 160kg in weight
- Over 34 metal component parts
- 7 key operated locks
- 2 digital keypad locks
- 5 metal doors
- 1 metal drawer with shoot
- 1 internal cabinet housing 3 tier shelving unit with individual self closing and locking doors
CAD design
Our CAD designers spent in excess of four days drawing up the cabinet in Solidworks for production. To give a comparison, an average part we design for an air conditioning unit may take up to 2 hours to program. The complex nature of the project, and the security aspect, meant extra detail and attention had to be paid on the joins, hinges, and any other element prone to attack. As we already have designed and manufactured a range of security chests and cabinets, this was familiar territory for us.
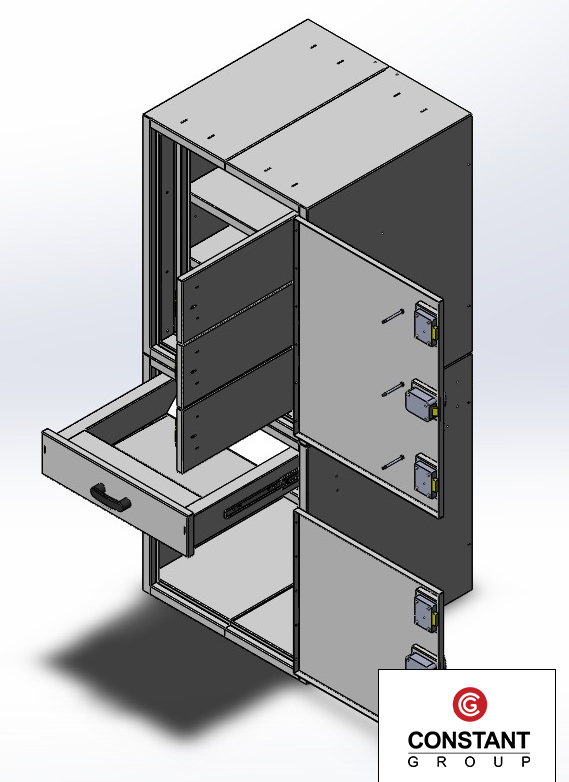
The unit can be seen here in closed view, open view and section view. Each drawing by the CAD team details the parts, assembly elements, bends, rivet placements, welding marks and of course, the shape to cut on the machines.
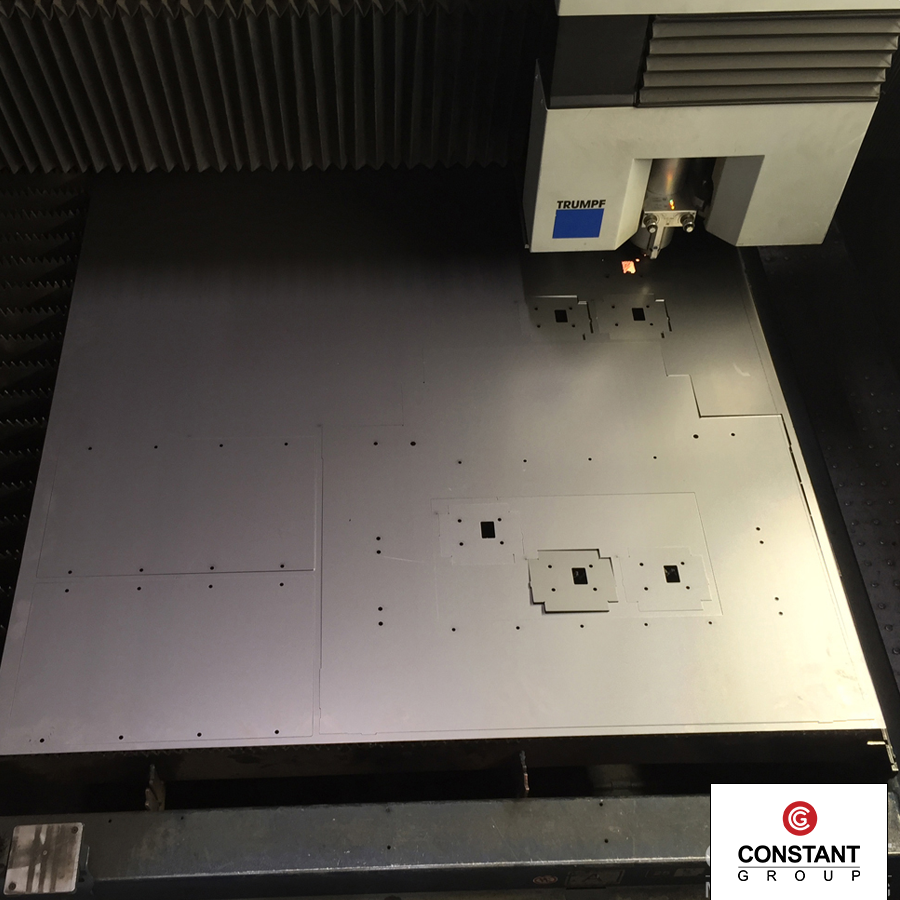
Laser cut
The sheet metal is loaded onto our laser cutter for the main shapes to be formed. The photo is of the main body of the POS display, made from 1.5mm thick mild steel, with; screw holes, product display sections, TV display cut-out and various shapes cut during the laser cutter stage to enable an efficient fabrication and assembly.
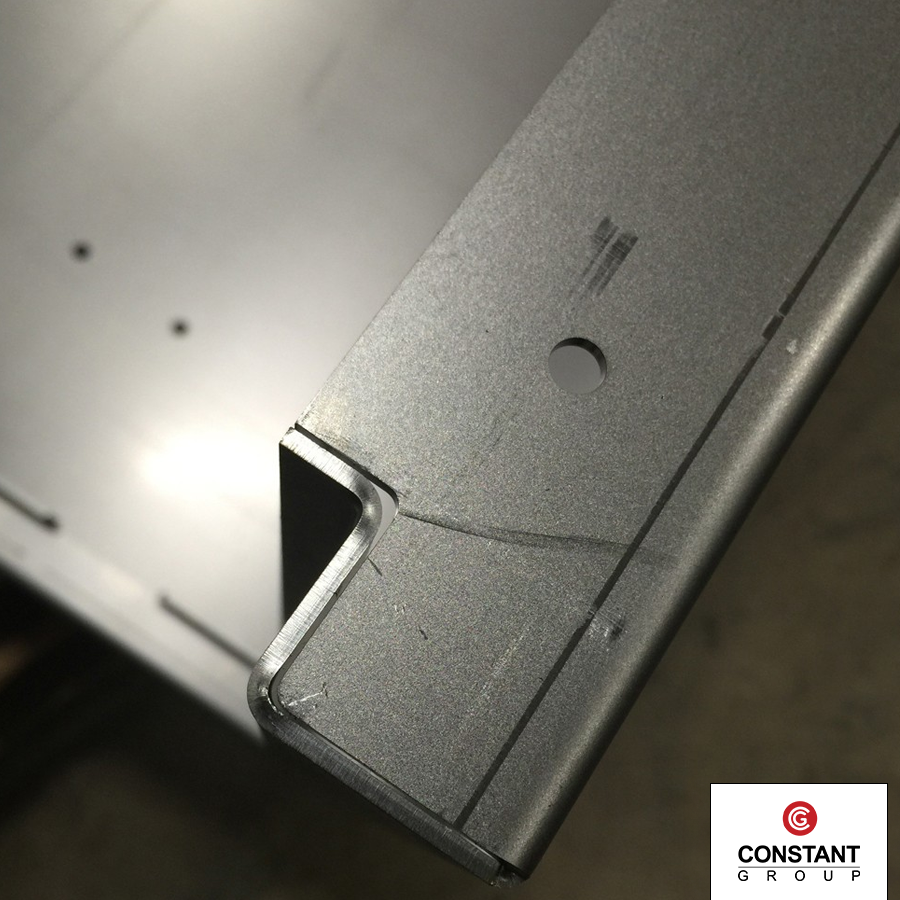
Press brake
The photos below highlight the complex nature of the cabinet and the bends involved in the design. To make a cabinet secure from attack, edges are bent in on themselves to prevent devices prying joints apart or open. Here you can see our machine operator bending one of the internal enclosures, using a combination of his time-served experience and the pre-programmed instructions to create expertly bent and sturdy metal work.
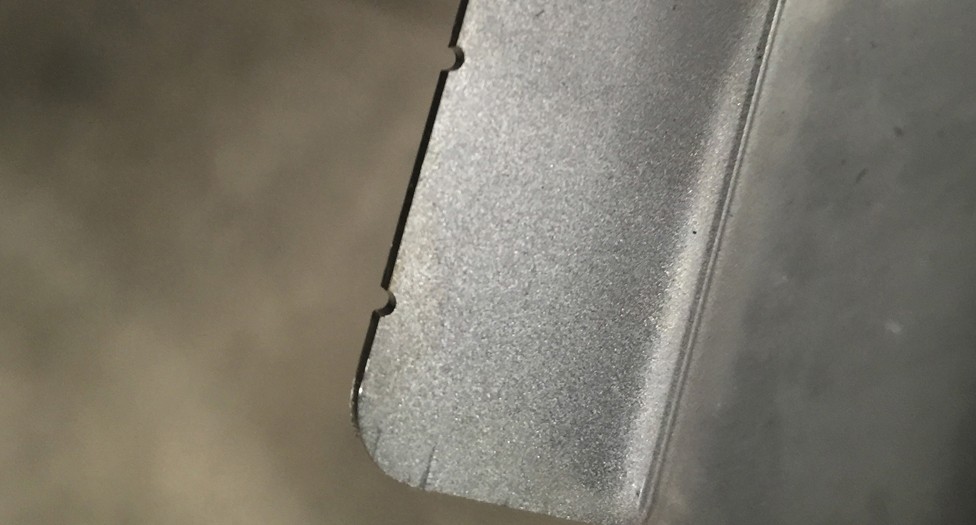
Did you know?
Small nicks out of the metalwork are not flaws or cutting errors, they are in fact called castellated marks to indicate where to weld when welding parts together.

Riveting the enclosure
Once bent, our team of welders rivet various parts together before welding. This speeds up the assembly of the main units, and reduces the quantity of tack welding required when joining the parts securely together. Rivets also hold the unit in shape, reducing the need for several jigs.
The rivet holes are pre-programmed in during the CAD and laser cutting steps, so there is no guess work to as where the holes are, and alignment of the cabinet. It is much like slotting together a large jigsaw with the rivets as guide marks.
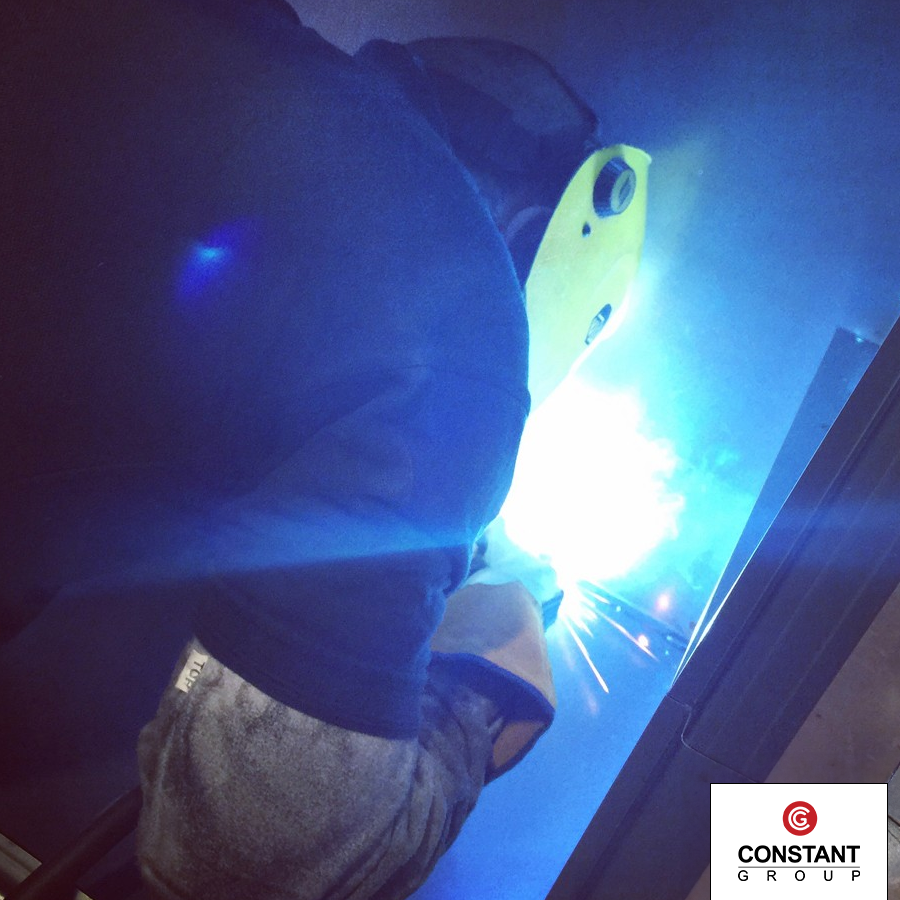
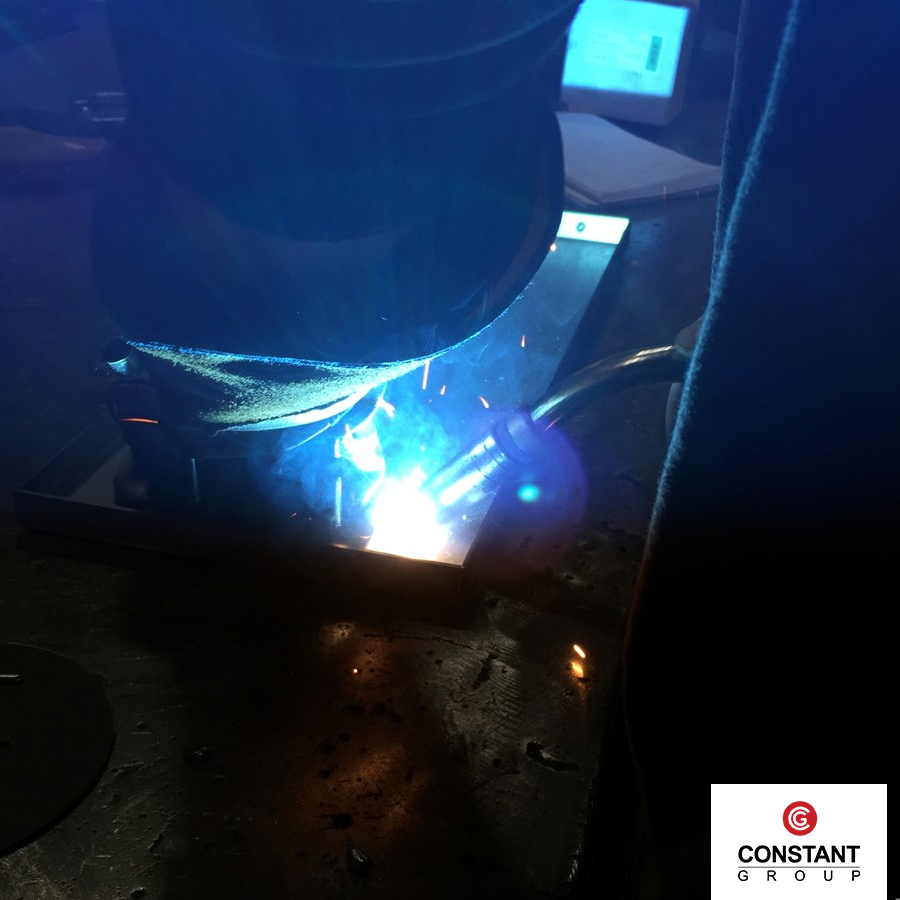
Tack welding
The welding team then took the riveted enclosure, and tack welded the inside seams before MIG welding them together. All the joins are secured by two methods when finished; rivets and welds.

Did you know?
Tack welding is the same concept as pinning and sewing. Tacks (pins) are dotted along a join to secure it in place tightly before the MIG welding (sewing) welds along the entire length sealing the join.
Top-hats
To give extra strength to the sides of the cabinets we insert metal bridges, described as ‘top-hats’ in the industry. These top hats are put along the walls of the external cabinets, but also help locate the internal cabinets into place.

Making of the drawer
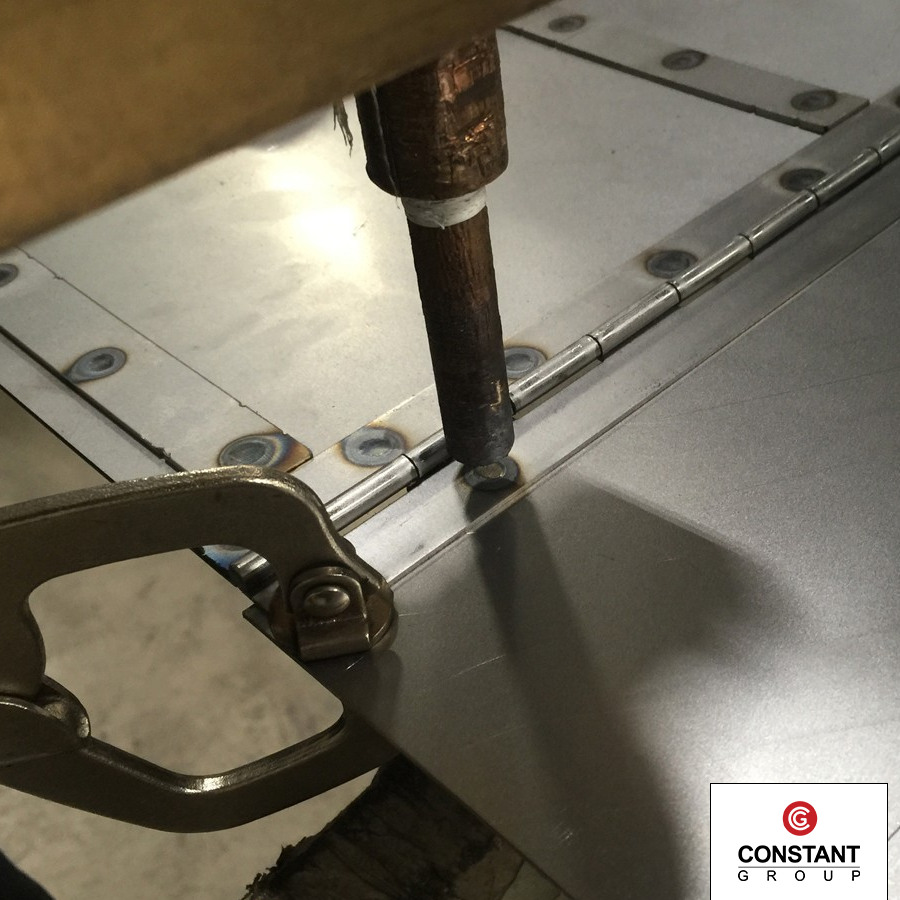
The drawer within the bottom metal cabinet isn’t as simple as it initially looks. It holds a drop flap to allow the contents of the drawer to drop into the locked cabinet below. The flap has to be strong enough to hold large volumes of coins without buckling, so it is reinforced with metal strips seen in the photos as the ‘E’ shape.
Then the hinge on the flap is fixed to the drawer’s back panel. The welder clamps the two pieces together with a small hand clamp, and then the hinge is spot welded using a spot welding machine. The welder knows where to place the spot welds as there are small engraving marks in the metal work designed by the CAD team and laser cutter. The spot welds went in repetition in-between the knuckles of the hinge.
When the shoot flap is attached to the main drawer body, the team attached a set of rollers to guide the drop flap back and forth when the drawer is in motion, making it easier to operate.
The drawers then have runners attached, and then fitted permanently into the bottom cabinet.
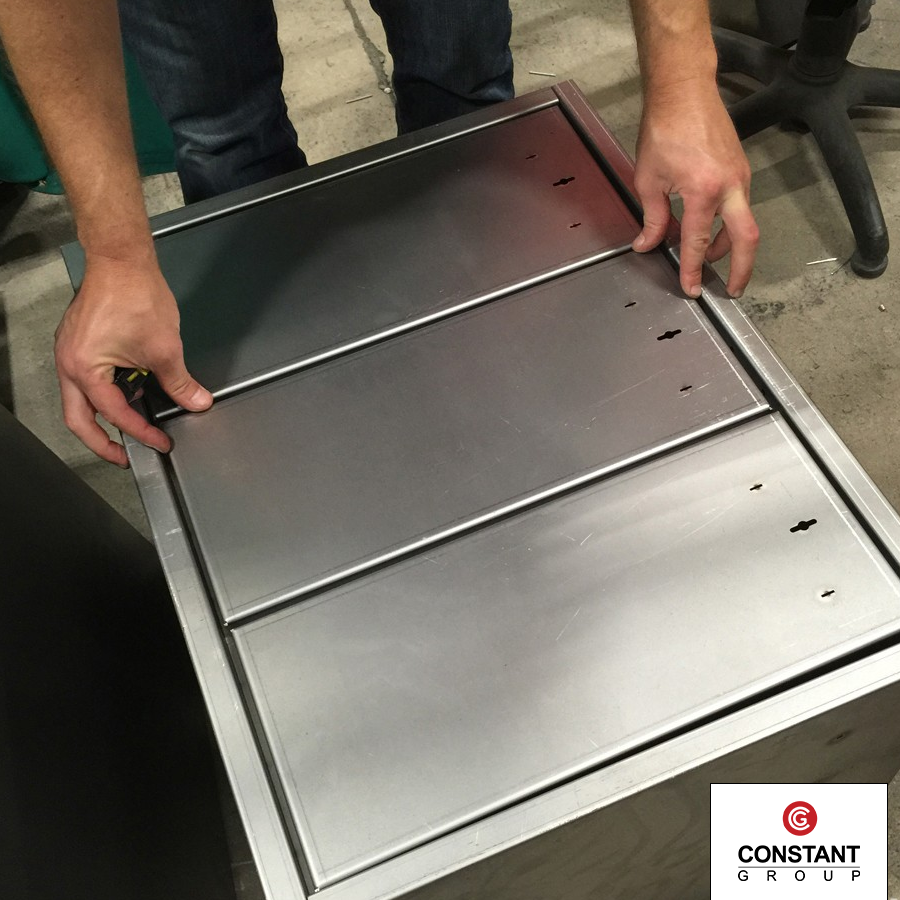
Forming the top cabinet
The top unit consists of a three shelved unit, which is transformed into a three tier secure cabinet, with doors, self closing studs and locks.
Before the internal unit is fitted into place, the welder checks that the doors align and fit snug enough to deter attack. The client provided specialist internal locking mechanisms for us to fit. These were bolted into place and then the locking unit was welded to secure it further.
The team place the internal shelving unit into the main top cabinet. It is riveted into place at the bottom and top. This unit doesn’t need to be welded as it won’t be vulnerable to attack from external forces as it sits within the main external cabinet.
Now the top cabinet has its internal section in place, all the doors, which there are four of, are attached to the main body of the enclosure, and to the internal unit. We’ve used specialist piano style hinges, which means they only need to be riveted into place with minimal welding.
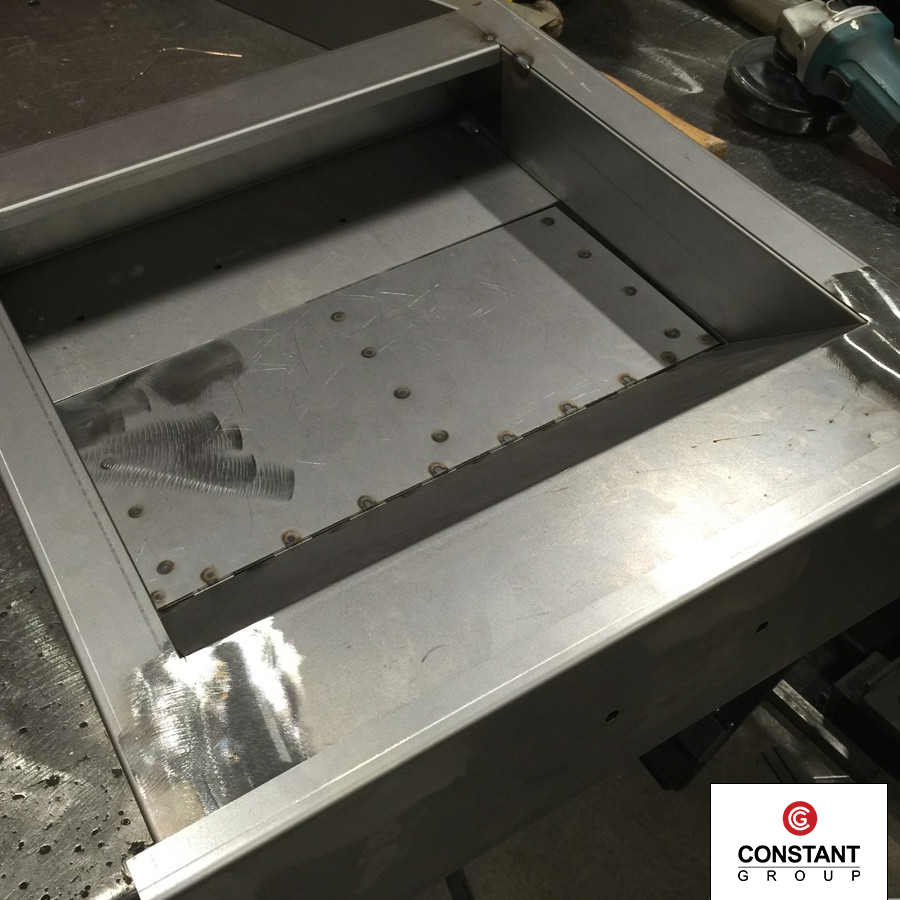
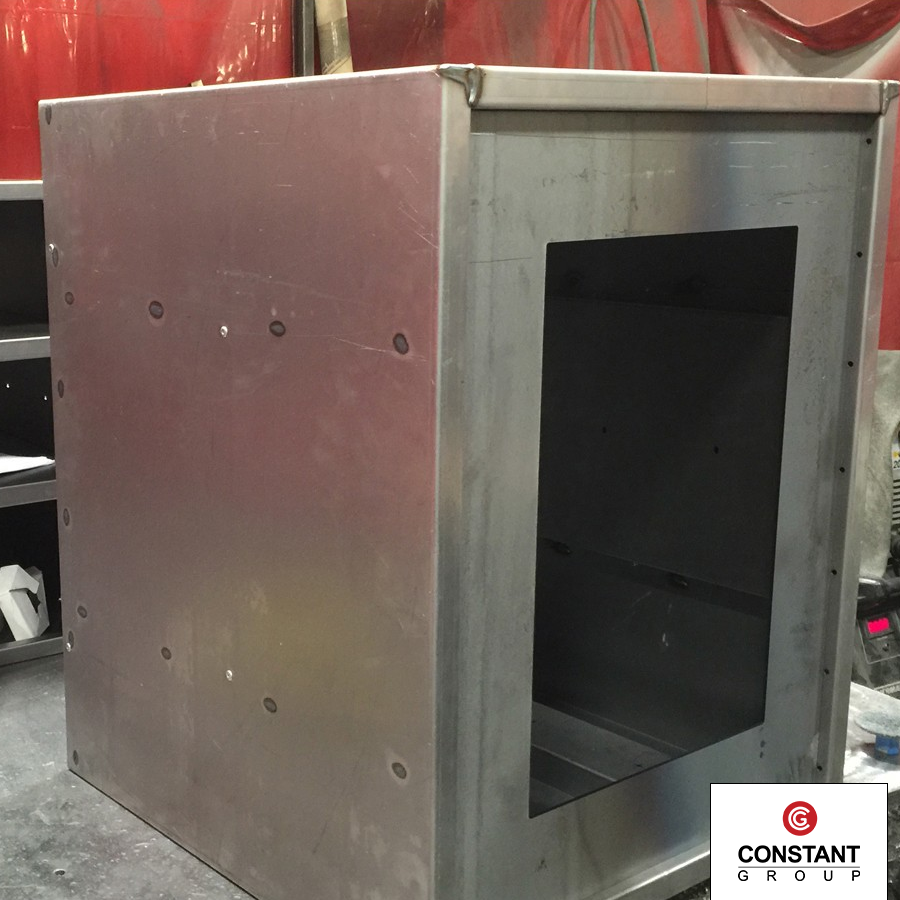
Bottom casing
The bottom cabinet also has an internal cabinet. This one holds the contents deposited from the drawer above. This internal cabinet was riveted together initially during the first stages, however it then has a jig placed inside, which can be seen as the square shaped ‘O’ in the photo, as this allows the welder to guarantee the welds will be at the correct angles, reducing the movement of the cabinet when welding.
Once the cabinet is welded, he grinds down the welds to make them smooth. This isn’t just for aesthetics, it also helps prevent the internal cabinet from sticking or not fitting into the external cabinet.
Keypad locking mechanisms are fitted onto the two external cabinet doors, alongside a traditional key operated lock.
Testing
- For our example we’ve used Mr Badger. He is a favourite toy of Rosie, one of our office dogs. What better way to demonstrate a secure money cabinet than making sure one of our mascot’s toys are kept safe!
- If you open the drawer again the contents have disappeared. The shoot flap can’t be pushed or forced down due to the design. It has a hidden shelf making the shoot flap, when open, double strength and ridged. Again, another measure to prevent opportunist theft.
- Opening the bottom cabinet reveals Mr Badger, safe and sound. Sent down there by the automatic shoot built into the drawer above. You can see the shoot’s flap in the top half of the photo.
Final product
The end unit (without locks as these are fitted by the customer) went into full production at Constant finished with a textured powder coated grey.
