CASE STUDY
Interactive display unit
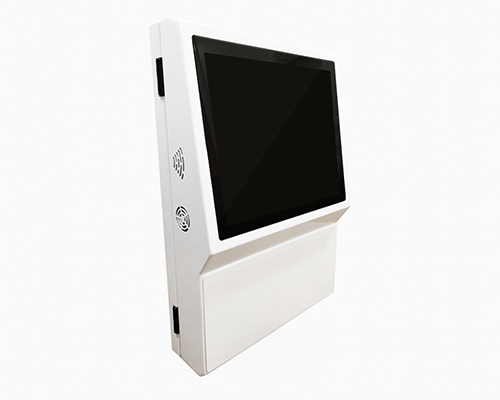
This case study looks at how we made a set of metal interactive display units from several pieces of metal, with ancillary components supplied by the customer such as; hard drives, fans, routers and a touch screen display. This unit will be multi-purpose in application from pharmacy dispensing assistant displays to high-street reward card point machines. The design therefore was to be clean, simple and easy to brand by our customer, and fit for purpose.
Here is a snapshot of the fixings involved in the design and manufacturing of the unit:
- Hinges x 2
- BZP bolts x 16
- Various pressed in fixings x 73
- Rivnuts x 16
- Weld studs x 12
- Foam tape at 2.5 metres long
CAD design
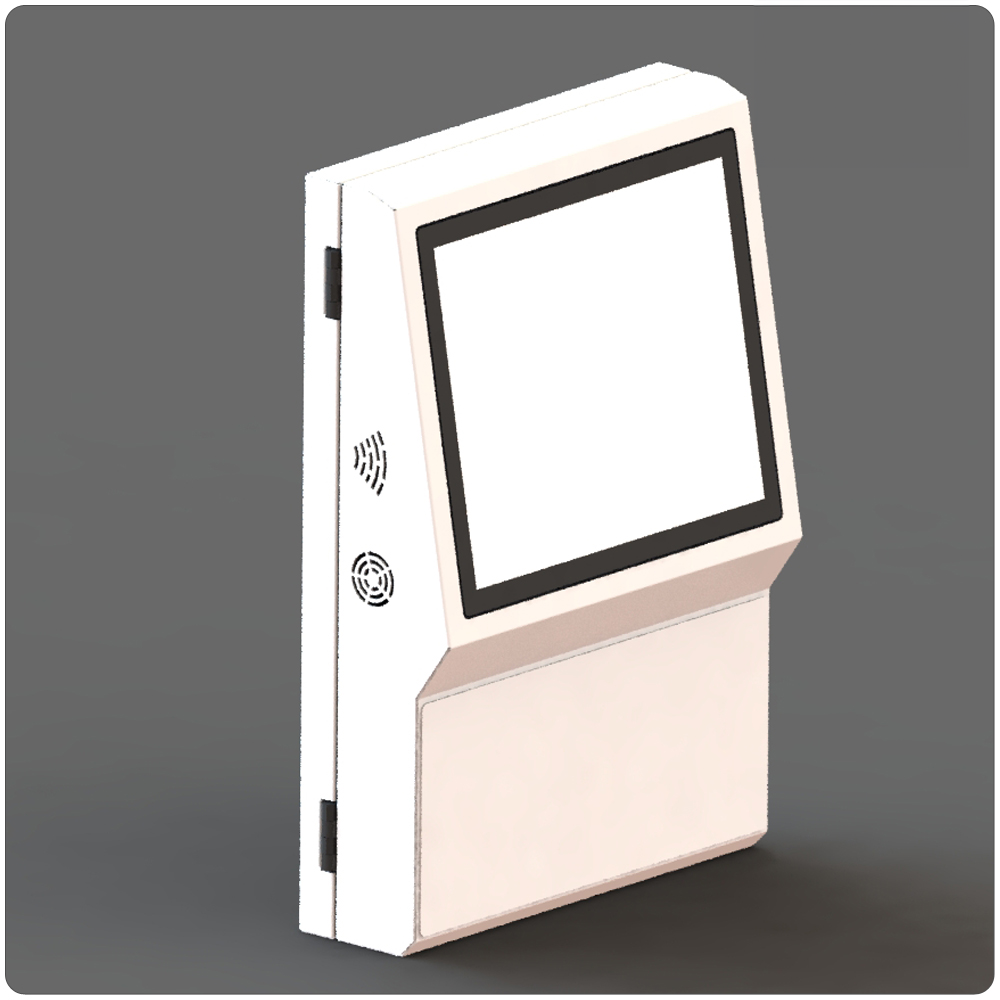
Our team met with the client to go over their concept, sketching ideas and making notes through the conversation. Once the principles of the design were confirmed, our CAD design team got started with a 3D visualisation using Solidworks. This 3D representation of the finished unit also included the internal layout of the cabinet, including the placement of the customer’s electrical components, as well as the overall appearance.
Our CAD team took the visualisations, and began work on finalising the design, structure and part layout to produce 25 pages of manufacturing drawings. These drawings included the cutting program for the laser cutting machine through to assembly drawings for the customer’s components.
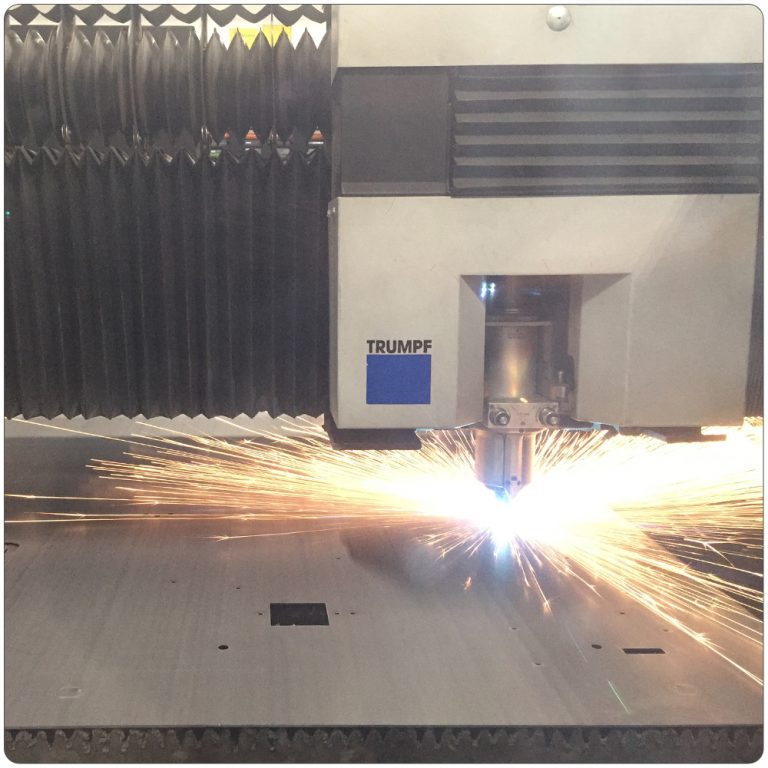
Laser cut
The first step in the manufacturing factory was to load two sheets of CR4 mild steel onto our laser cutter. One sheet at 1.5mm, and another at 2mm, both measuring 2500 x 1250mm in size.
The cross hair (centre of the main photo) shows where the laser head is on the metalwork. You can follow it around the cutting process by simply watching the machine’s PC display. Or, like us, you can watch the magic happen at the cutting head by viewing it through the double door panels.

Press brake
Our experienced press brake team bent the range of parts to form the body of the unit. They use a combination of the CAD drawings and time-served experience to decide which tools to use and measurements for each bend to execute the folding correctly.
Did you know?
Parts are tested mid-production to check all the ancillary parts, folds, cuts and pieces slot together before welding commences.
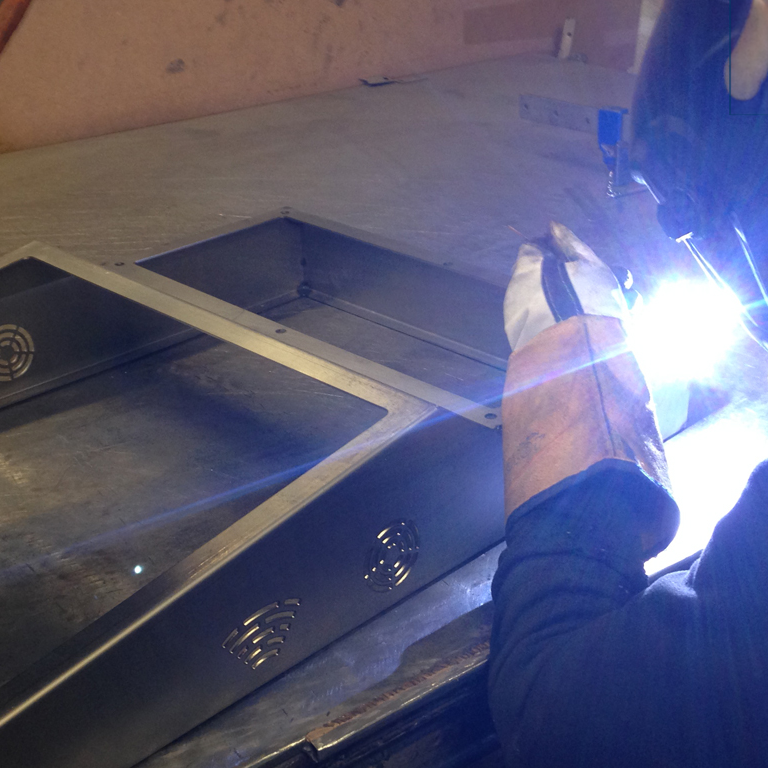
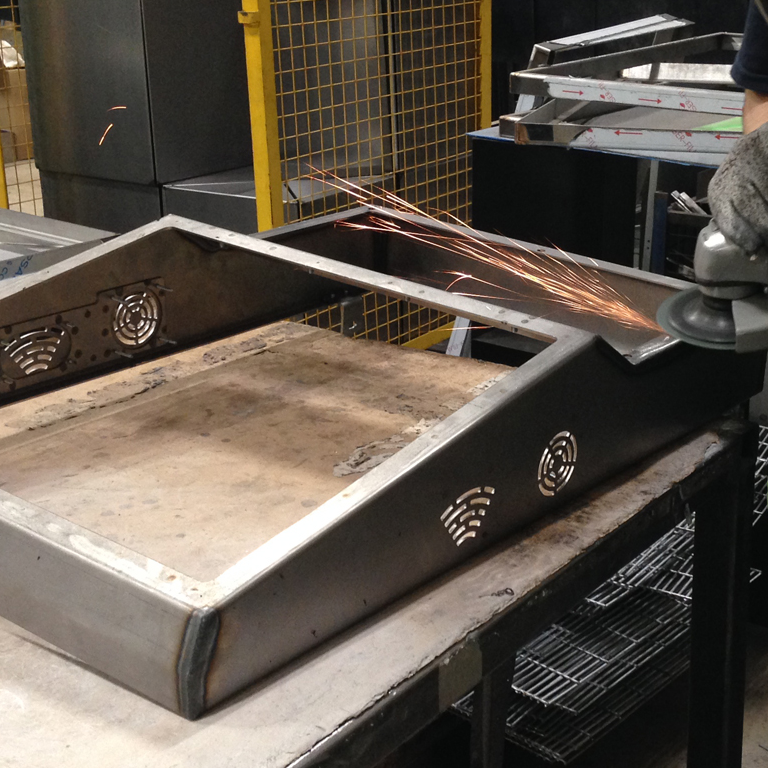
Fabrication
Using the TIG welding technique, the welder, welds all the seams around the unit’s edges. He takes care to not warp, or distort, any of the metalwork while doing so, and will use precision flat edge to ensure the pieces are straight.
The units are now welded, it’s time to finish the edges and remove any blemishes from welding in the grinding and linishing department. They work on each weld to ensure the edges are smooth, allowing for the best possible finish when powder coated. A combination of tools are used from hand sanders to angle grinders depending on the nature of the weld being finished off.
Powder coating
The test components are removed, and the metalwork is sent to the powder coating plant at Constant Manufacturing. Once the pieces of metalwork are pre-treated, dried and then checked, they head towards the powder coating bays, all automated.
The unit is sprayed crisp gloss white, to give the best possible finish to apply a variety of brand graphics onto.
Assembly
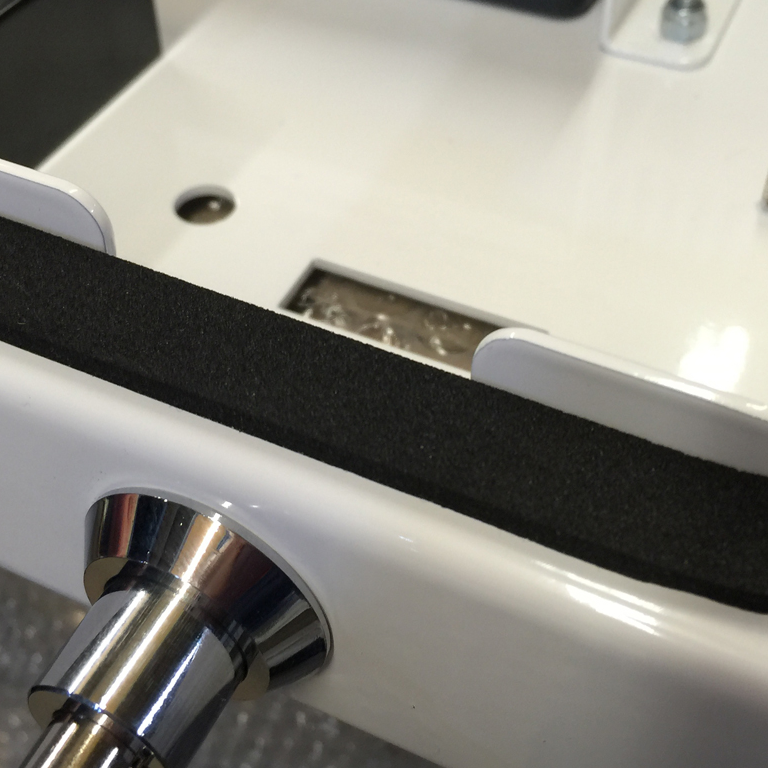
Once the parts are cool, from being powder coated, it was time to construct all the parts into the finished display unit. You can see from the photos, even the internal metalwork is finished off in white, to give the best possible product to the customer. Our CAD team paid particular detail to the screen integration, to produce a smooth flat screen finish, with very little gapping.
Discreet hinges which are built into the side of the metalwork. The hinge’s pin is protected by the metalwork, making it less susceptible to vandalism and attack. Alongside the hinge there is a curved door stop that prevents the door being opened too far and also helps keep the door in place when the cabinet is being worked with on-site.
Final product
And finally, the unit was to be as multi-functional as possible, and therefore it needed to have a back plate option. A clip on, clip off, wall plate was manufactured to be used if the interactive display unit has to be wall mounted. It would work by the back plate being mounted onto the wall first, and then the body of the display cabinet being ‘hooked’ onto the hangers. To secure, there would be a range of fixing bolts applied internally, preventing theft or tampering.